Well another few months sneak by... I left off with us about to start the front entrance way and, of course, this quickly expanded to the kitchen!
 |
| The Kitchen before |
 |
| The disaster that is our dinning room... |
The house is like an episode out of hoarders! It's almost choking but once the kitchen was put into place and all of the displaced kitchen things find a new home the mess has subsided for a few days until we start our next project....
 |
| The dining room has become out temporary cookery. |
 |
| Tyler packing the dishes upstairs in little wash basins to be washed in the bathtub |
My least favorite part of loosing the kitchen was loosing the sink and running water and the drain. So like in the motorhome I'd do the dishes in my little basins.
Once we got started the floor went very quickly. Mum could cut them as fast as I could lay them. Below is a shot of the blue underlay and the flooring being placed over it. It's kind of weird to me that the flooring isn't actually attached to anything and just floats on to of the blue stuff but hey it works.
 |
| Started Flooring |
We went with an Ikea kitchen mostly for the cost. As the competition was about twice the price for the same thing and Ikea cabinets are of equal quality. I particularly like the rail system that Ikea uses now. Just put the rail up and the cabinets hang on the rail. Of course the rail assumes the beams are a standard distance apart for mounting so there was some extra drilling through the rail to find a stud.
 |
| The first cabinet installed |
 |
| One side done |
We ended up cutting out the door frames and making them bigger so we ended up loosing the end cabinet on one side and have to take it back to get a smaller one.
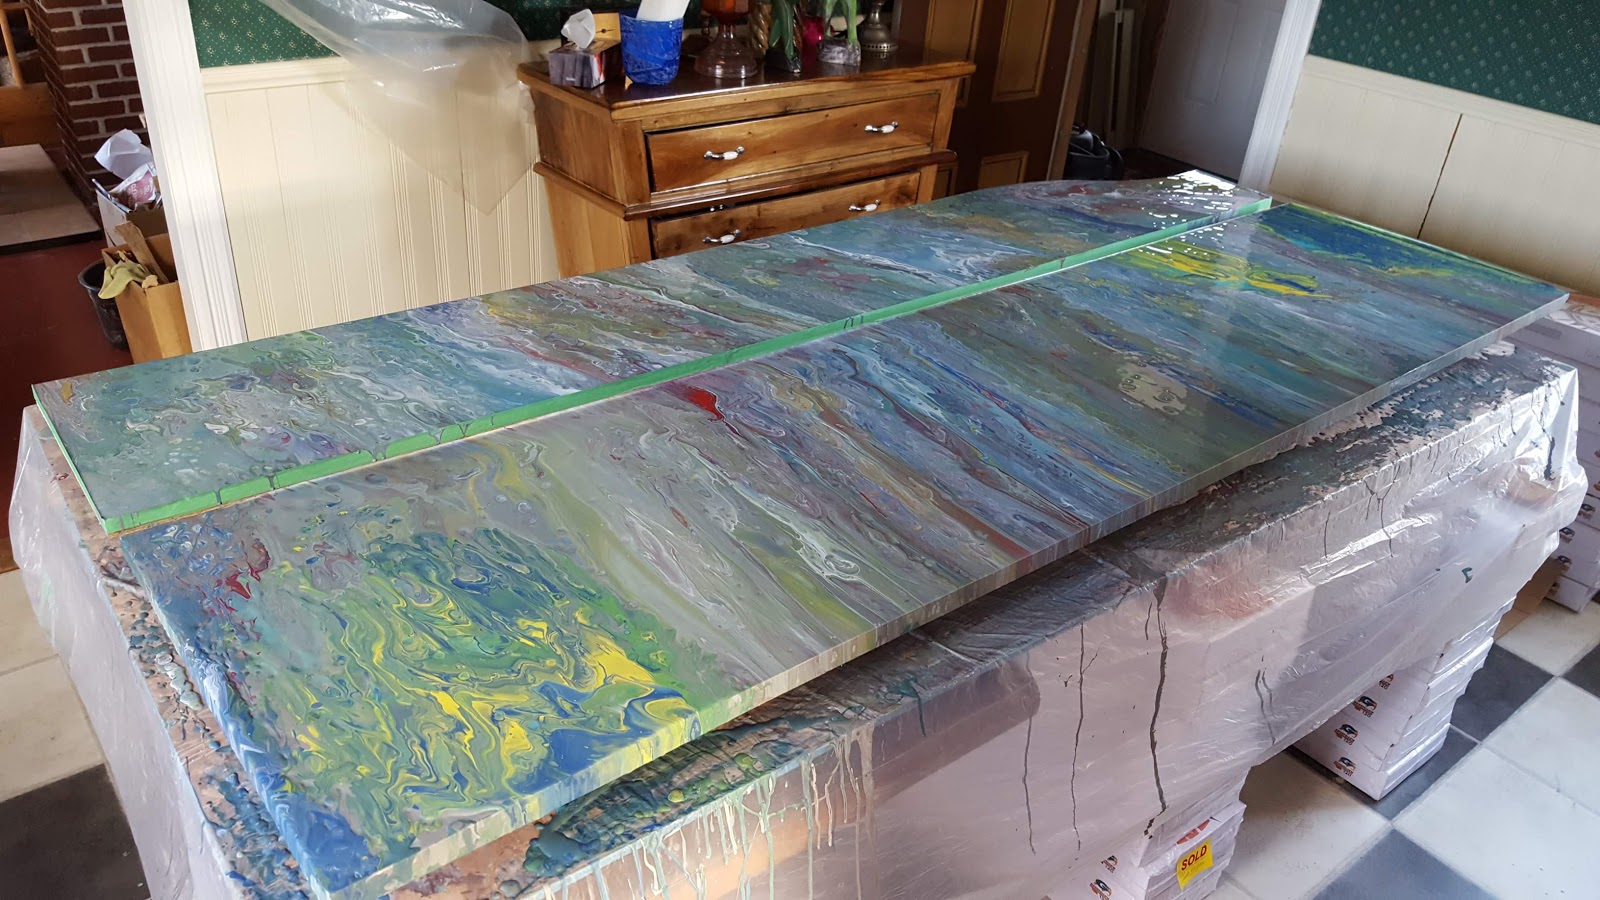
Next was making the counter tops. That was a lot of fun; if not a bit challenging! The first step was to measure and cut 2 pieces of plywood to the right size. Our counters are longer than 8 feet so we had to cut and glue multiple panels together. You can see the seam in the picture below but once the paint and resin is on it becomes really, really difficult to find.
 |
| The new counter tops (2 sheets of plywood cut and glued together) painted |
 |
| Getting the colours ready for the acryllic pour |
To get the effect we wanted we poured each colour into a little cup with about 1:1 ratio of white glue and just a splash of water to thin it out. Then in the bigger cups we would pour a little amount of each colour in layers with a few squirts of silicone lubricant. Afterwards we put the cups of layered paint upside down on top of the countertop and pull the cup straight up dumping the paint into a puddle on the counter top.
 |
| The cups set upside down and pulled straight up leaving a pool of paint |
 |
| A paint pool |
Next was the... interesting... part. Lifting the countertops high enough for the paint to flow around and cover the entire counter.
 |
| One of the smaller counter tops. |
 |
| Another small counter top |
 |
| The two large countertops |
Once that's all done it takes about 3 days for the acrylic to dry before we can pour resin as a protective layer. It took us two resin pours as the first pour had troubles covering areas of the acrylic below. We think it was being repelled by the silicone and took an extra thick bit which is a good thing anyway as its just more counter top protection.
 |
| The two large countertops covered in resin |
 |
| A closeup |
 |
| Resin has dried leaving a shiny counter top that's almost like water. |
 |
| The counter top installed with the sink cutout sitting on top of the sink. |
Cutting the sink hole out of the counter was, well, difficult. I had a really tough time time getting over that I had to put a hole through such a piece of art!
 |
| A cutout of the counter top (The wood is about 1/2 the thickness of the overall counter) |
 |
| The kitchen as is stands right now |
 |
| Yay kitchen! |
It's been a fun build! There were some little things like moving the lights over 6 inches so that the new doors would open. Oh and finally replacing those awful florescent lights with LED lights.
There's a few things left to do like the back splash and toe kicks. And the trim around the ceiling floors and door frames. Oh and the microwave has to be removed and a one inch spacer added to pull it forward a bit so it doesn't hit the door next to it. (My bad I measured before installing the doors and forgot to take the extra distance in account when we installed the microwave).
But it's Christmas day and I'm surrounded by my hoard which includes a new action camera! I'll have to make some videos now!
The next big job is the downstairs bathroom where we'll need to remove the old shower and toilet, relay the sub floor and move the washing machine in. Actaully that was a fun day... Doing the laundry which is in the back room and it turns out not insulated underneath at all and the drain pipe froze solid so it exploded water all over the floor! Luckily I caught it quickly and it didn't cause any permanent damage. So now there's a space heater under the floor for when it gets too cold again. Like today.... Oh dear the mercury dropped time to go turn it on again!
Merry Christmas... (Or Happy Tuesday if your not into that sort of thing!)