Banner Animation

Tuesday 25 December 2018

Merry Christmas!

Well another few months sneak by... I left off with us about to start the front entrance way and, of course, this quickly expanded to the kitchen!
The Kitchen before
The disaster that is our dinning room...
The house is like an episode out of hoarders! It's almost choking but once the kitchen was put into place and all of the displaced kitchen things find a new home the mess has subsided for a few days until we start our next project....
The dining room has become out temporary cookery.
Tyler packing the dishes upstairs in little wash basins to be washed in the bathtub

My least favorite part of loosing the kitchen was loosing the sink and running water and the drain. So like in the motorhome I'd do the dishes in my little basins.


Once we got started the floor went very quickly. Mum could cut them as fast as I could lay them. Below is a shot of the blue underlay and the flooring being placed over it. It's kind of weird to me that the flooring isn't actually attached to anything and just floats on to of the blue stuff but hey it works.
Started Flooring
We went with an Ikea kitchen mostly for the cost. As the competition was about twice the price for the same thing and Ikea cabinets are of equal quality. I particularly like the rail system that Ikea uses now. Just put the rail up and the cabinets hang on the rail. Of course the rail assumes the beams are a standard distance apart for mounting so there was some extra drilling through the rail to find a stud.
The first cabinet installed
One side done
We ended up cutting out the door frames and making them bigger so we ended up loosing the end cabinet on one side and have to take it back to get a smaller one. 

Next was making the counter tops. That was a lot of fun; if not a bit challenging! The first step was to measure and cut 2 pieces of plywood to the right size. Our counters are longer than 8 feet so we had to cut and glue multiple panels together. You can see the seam in the picture below but once the paint and resin is on it becomes really, really difficult to find.
The new counter tops (2 sheets of plywood cut and glued together) painted
Getting the colours ready for the acryllic pour
To get the effect we wanted we poured each colour into a little cup with about 1:1 ratio of white glue and just a splash of water to thin it out. Then in the bigger cups we would pour a little amount of each colour in layers with a few squirts of silicone lubricant. Afterwards we put the cups of layered paint upside down on top of the countertop and pull the cup straight up dumping the paint into a puddle on the counter top.
The cups set upside down and pulled straight up leaving a pool of paint
A paint pool
Next was the... interesting... part. Lifting the countertops high enough for the paint to flow around and cover the entire counter.
One of the smaller counter tops.
Another small counter top
The two large countertops
Once that's all done it takes about 3 days for the acrylic to dry before we can pour resin as a protective layer. It took us two resin pours as the first pour had troubles covering areas of the acrylic below. We think it was being repelled by the silicone and took an extra thick bit which is a good thing anyway as its just more counter top protection.

The two large countertops covered in resin
A closeup

Resin has dried leaving a shiny counter top that's almost like water.
The counter top installed with the sink cutout sitting on top of the sink.
Cutting the sink hole out of the counter was, well, difficult. I had a really tough time time getting over that I had to put a hole through such a piece of art! 


A cutout of the counter top (The wood is about 1/2 the thickness of the overall counter)

The kitchen as is stands right now

Yay kitchen!
 It's been a fun build! There were some little things like moving the lights over 6 inches so that the new doors would open. Oh and finally replacing those awful florescent lights with LED lights.
There's a few things left to do like the back splash and toe kicks. And the trim around the ceiling floors and door frames. Oh and the microwave has to be removed and a one inch spacer added to pull it forward a bit so it doesn't hit the door next to it. (My bad I measured before installing the doors and forgot to take the extra distance in account when we installed the microwave).

But it's Christmas day and I'm surrounded by my hoard which includes a new action camera! I'll have to make some videos now!

The next big job is the downstairs bathroom where we'll need to remove the old shower and toilet, relay the sub floor and move the washing machine in. Actaully that was a fun day... Doing the laundry which is in the back room and it turns out not insulated underneath at all and the drain pipe froze solid so it exploded water all over the floor! Luckily I caught it quickly and it didn't cause any permanent damage. So now there's a space heater under the floor for when it gets too cold again. Like today.... Oh dear the mercury dropped time to go turn it on again!

Merry Christmas... (Or Happy Tuesday if your not into that sort of thing!)

Tuesday 6 November 2018

Happy Post Halloween!


Halloween was quite funny actually! We had 6 whole trick or treaters including the two standard teenagers not dressed up. I can't say much I was no better. We did put out a few decorations but I forgot to take a picture. 😞 There have been a few smashed
captivated cats

Installing the picture window on the front of the house was interesting but with the help of Tony at Home Hardware who generously offered a few hours of his time, to help up lift the old window out and the new window in, it was fairly painless.


There's mum screwing the window into place.

We've kind of been dragging our heels this last week. Even though we've accomplished a few things like emptying the tanks in the motorhome... Which reminds me I need to finish winterizing it! Ooooh and getting 3 cords of wood cut and stacked. We finally had to cave after 6 months of being here and no residential pipe fitters to install propane. Even the propane suppliers shrugged and said they'd happily deliver but wouldn't install and couldn't offer any local names.

Yesterday we decided it's time to get back into the swing of things and get some work done! Mum took on the task of ripping apart the mud room. Found an exterior wall with no insulation so had to add that and meanwhile I replaced baseboards. (She's afraid of electricity 😏)

replacing the ceiling

This is going to be a short post.... *not to self: more pictures Tyler, more pictures* Tomorrow we add a sub floor, finish insulating, and maybe Drywall the mud room before tackling the kitchen!

Tuesday 16 October 2018

Grandma, Halifax, Doors, & Windows

Its been another busy few weeks.. Grandma came to visit for 2 weeks and headed home. We had to take her back to Halifax to catch the plane which worked out well as we spent an extra day in the city to let loose and travel the Halifax portion of the Good Cheer Trail which is a kind of passport for the Breweries and Distilleries. At each stop you can get them to stamp your booklet and then submit the booklet online for prizes and, if you have enough stamps, a t-shirt. It was tonnes of fun and got to meet lots of interesting people! We even ran into a group of people taking another brewery tour and crossed paths a couple of times. They were a lot of fun to chat with before their tour guide dragged them away. You know who you are... ;-)

A few really neat spots to check out included Chain Yard Urban Cidery, Compass Distillers, Good Robot Brewing, and Garrison Brewing (my current fav is their Irish Red). I would definitely like to do the trip again. For those interested here's a map of our glorious walk on Google Maps
Random Wall art in Halifax
After that debauchery it was time to go home and recoup. While in Halifax we picked out the new kitchen from Ikea. Mum drew up all the plans and we spent about 2 hours re-inputting them into the Ikea computer. They have a pretty neat kitchen designer online even if it takes a bit of fiddling (like everything else it seems). I really liked the high gloss gray-turquoise cabinets but it's hard to justify spending another $1000 just for a colour so white it is. Right now the whole house is filled with boxes for the kitchen (over 100) and laminate flooring (50). At one point we had to move half of a pile as the floor started to groan about the weight!


We also bought a new fireplace hearth and installed it. So much nicer than the old bricks on aluminum sheet on plywood pad. We finally gave up on trying to find someone that can install a propane system and had the local chimney guy come in and take a look. Turns out there's no need for a liner as the one that's in there is good and just had to schedule him to swing by in the spring to do a bit of repair to the mortar before it becomes a problem. Mum's had the fireplace going a few times now (She's been itching for weeks to try it out) and hey look at that we didn't burn the place down! Still debating on if I'll replace the old fireplace with a new one or just leave it. The handle is a bit messed up and I need to find a metal works to see if they can fix it.

New Fireplace hearth

The other really exciting part is we managed to get two doors and two windows installed! The first door pictured below took us 9 hours to get it into place and still isn't quite aligned properly. We'll probably have to pop it out and reinstall it (ugh. When you get tired sometimes it's best to just walk away and come back to it the next day). But the second door went in much easier and works like a dream! 

Front door and brackets installed

The two windows are both on the same wall overlooking the kitchen and front porch. I was actually surprised how easily the window installs went. The hardest part was making the rough opening the right size. But it was just measuring out a few 2x4s (OMG it drives me insane that a 2x4 is not actually 2" x 4" and is really slightly smaller) and screwing into place. There was a lot of back and forth and a few undos in there before we worked out the alignment and making sure to leave space for wall boards for the shingles to attach to.

Mum as we remove the old window
The old window (and a new door in the background)
Getting ready for the second new window to be put into place


New windows installed!

 The kitchen window had started to leak and we were really concerned that the leak was coming in from somewhere above in the wall but I was woken up at 5 am this morning to my bed shaking as the wind pelts the house with rain. You can actually feel the deflection of the glass door in the sitting room as the wind slams into the side of the house. But good news... no leaks! And the whole place is noticeably warmer with 4 less draft sources. 

You might have noticed the trim round the windows isn't an even width all the way around. Well looked at the wall and the shingles and decided in the spring we're going to have to spend a few weeks and replace the whole wall of shingles. For the meantime we'll have kooky trim. 

It's still howling out there but I'll leave with a pic of the locals wandering though the yard...
The locals passing through


Wednesday 26 September 2018

Whoa Whoa Whoa a whole month is just gone!

Well... Nearly a month since my last post! Bad Tyler! 🙊

It's been a busy month! We've completed a deck and installed the front door. We also set up an Etsy shop for mum's jewelry! Hrm putting it down in writing makes it sound like nothing!

The first big project we completed was our new deck! Mum built the plans and drafted the blueprint for us. Home hardware delivered everything we needed... They must love us by now. 

First was the fun part of removing the bottom two rows of shingles; Which turned out to be relatively easy once I worked out I could take the circular saw and set it to be just under the thickness of the shingles and ran it along the bottom! Lickety split the tiles were detached and nails, omg so many nails, were removed. After fixing up a few boards that needed to be replaced we installed the metal flashing and blueskin protector.
The first deck beam laid
 Mum's design made the deck just over 8' wide so that we didn't have to cut any of the joists. Which saved a huge amount of work! 
Base of the deck. Complete.

Starting the decking.

We decided to go with a 30 something degree angle.. because why not?
We set up the mitre saw and began cutting the boards until something when ptwang inside the saw and it stopped dead in it's tracks! So back to the circular saw to finish up cutting. Mum has a steady hand so it wasn't bad (unlike my inability to cut a straight line if my life depended on it).

We ended up running out of decking just before the last corner was finished! Initially we had planned to put a step at the end but decided to extend the deck out to the edge of the house which used up a bit more wood than we had planned to. So we had to call it a day and get a few more planks ordered.
Aaannnnddd we've run out of boards! 
Mum surveying the edge overlooking our junk pile.

 You can just see the little pile of remains that we had to take to the dump. It was about a moving box and I was quite pleased with how little waste there was despite cutting at an odd angle.

We took the old storm door and turned it into the back rail which added a great rustic look that matches the house nicely.
Completed!
 A few things I didn't get pictures of included digging the post holes which were actually really easy as the earth is quite soft here and there are hardly any rocks. As it turns out when they built the marina down the street they took all of the rocks from most of the nearby properties and so they cleared off our property of almost all the big rocks. It's been so dry here the last month that made digging really easy as well. Funny that the grass is all brown and the soil like powder even though the fog and humidity are quite high. Our dehumidifier still pulls 20 pints of water out of the air every 6 hours. Which, as my mind wanders, brings me to the well. Our hand dug 25' deep well that despite there being no rain and many wells in the area going dry still continues to supply us with water! Heh we've been stocking up on dehumidified water buckets all over the house just in case though!

Our doors and windows arrived and we've installed the front door. It took us all day and nearly killed us in the process I swear and I don't have any pics of the door install because of it. I'll post a shot of the front doors when its nice out (Finally rain!).

Our new front doors
We had actually planned to have the second door installed this week but grandma arrived and while taking her on a tour of nearby Shellburne the brake lines in my car failed, well sprung a leak. OMG really!? So it meant taking Lucy (My cars name) to Kia in Yarmouth so they can fix it. I'm just waiting for the call to let me know that I can drive back and pick her up. They were good enough to give me a courtesy car in the meantime to use. Which I almost have to duck to see out of the windshield. Oh, right, and now its raining *yay* so no installing the second door or windows for a few more days *aww shucks 😏*.

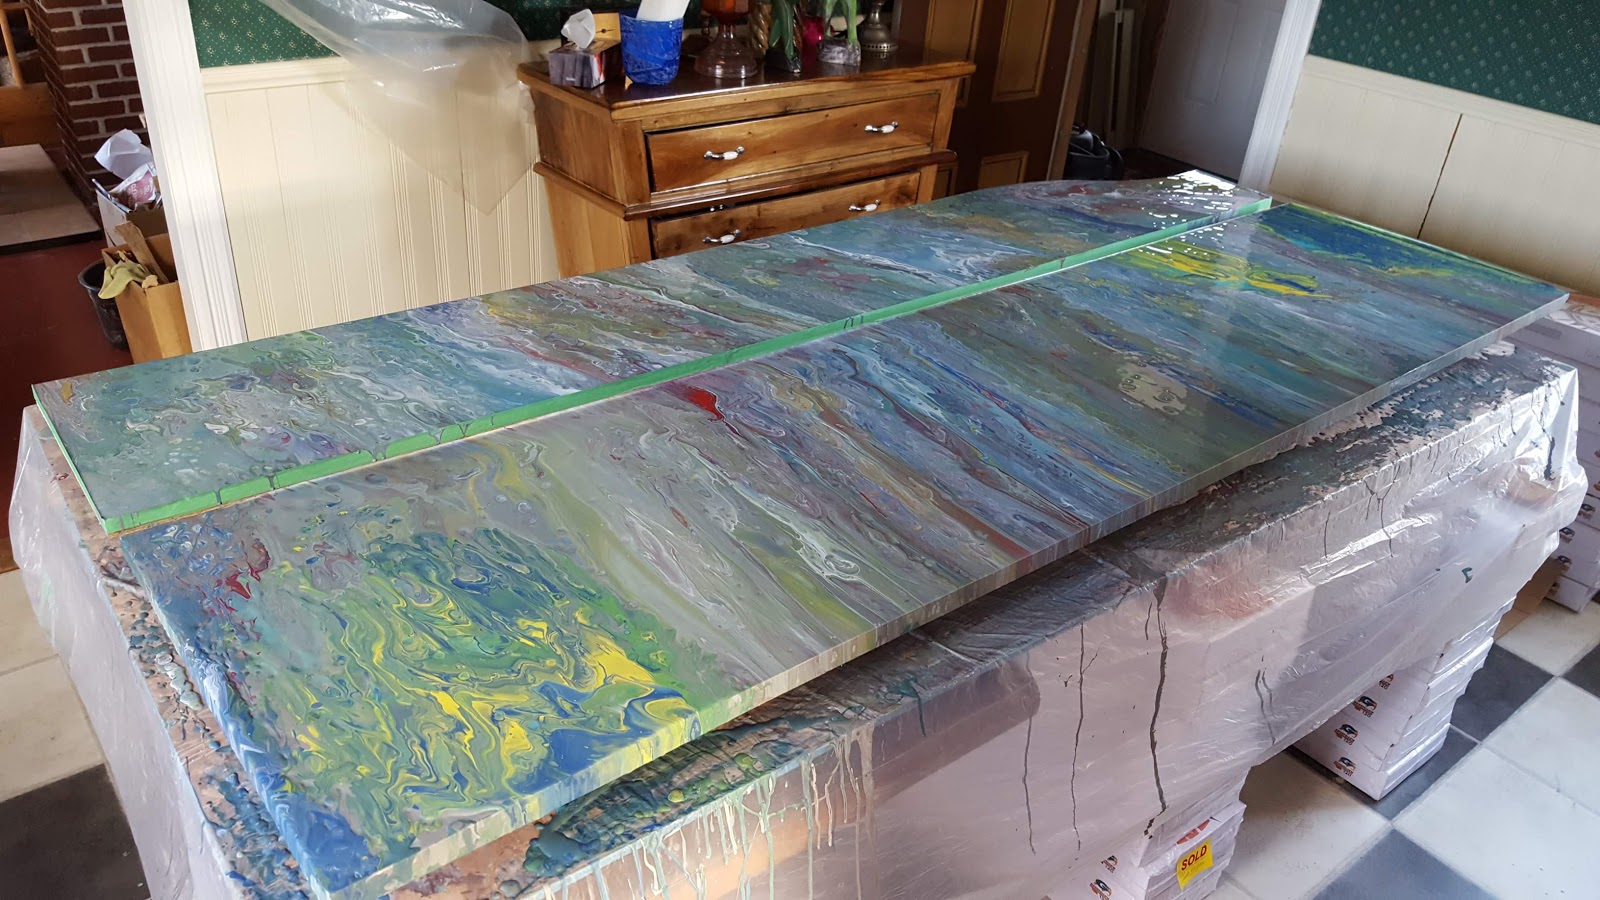
In other news I tried my hand at making an acrylic pour using silicone spray to make a really cool cell pattern in the paining. It's pretty funky!
My first acrylic pour


 And I'm closing today with a shot of mum and grandma hanging out near the causeway.


Tuesday 28 August 2018

Back to work

Geeze it's been almost a month since our last update! Time flies! 
It's been pretty quiet the last few weeks. We took a trip to Halifax for mums birthday and wow do I miss the city. The house is great and all but yeah... I think I might be a city person.
We've almost finished power washing the outside of the house. It's taken way longer than I expected but we're still on track for finishing the outside of the house before winter. The big livingroom window is sitting in Home Hardware waiting for us to give the OK for it to be delivered but I'm hoping to start the deck later this week.

Meanwhile Sam has decided that he's going outside and has been very adamant about it. So it's harnesses back on and out we go. 


Mum keeping an eye on Carl while he grazes.
Me keeping an eye on Sam while he grazes.


Sam of course is super happy to be outside and does this bounding hop with his tail straight up in the air.


On another front we've been playing around with acrylic pours and making cell patterns. It's really cool and you have no idea what it's going to look like until it dries (Which takes a few days). Even overnight it changes colours as the cells develop. 


One of mums creations
Toxic pond. Another one mum has made
My first attempt!
A close up of the cells

And a final little note we opened an Etsy shop to sell mums wire wrapped jewelry and our paintings. But more on that next time... I see mum is climbing the scaffolding outside so I better get my butt in gear and finish the last bit of power washing!